How to Identify Common Glass Bottle Defects in 2026?

Time:2026-10-05 Author:Isabella
0%

How to Identify Common Glass Bottle Defects in 2026?

Understanding what are common defects in glass bottles begins with careful observation, practical experience, and disciplined quality control. A bottle may appear clear and acceptable under warehouse lighting. Under stronger inspection lights, however, tiny stones, black specks, blisters, checks, or uneven walls can become obvious. These flaws may affect appearance, filling performance, sealing, transport safety, and customer confidence.

W. Edwards Deming, a respected quality-management expert, said, “Quality comes not from inspection, but from the improvement of the production process.” His point remains valuable for glass packaging. Inspectors should not only reject defective bottles. They should also trace defects back to mold wear, temperature instability, raw-material contamination, forming pressure, or poor handling. That connection is often missed.

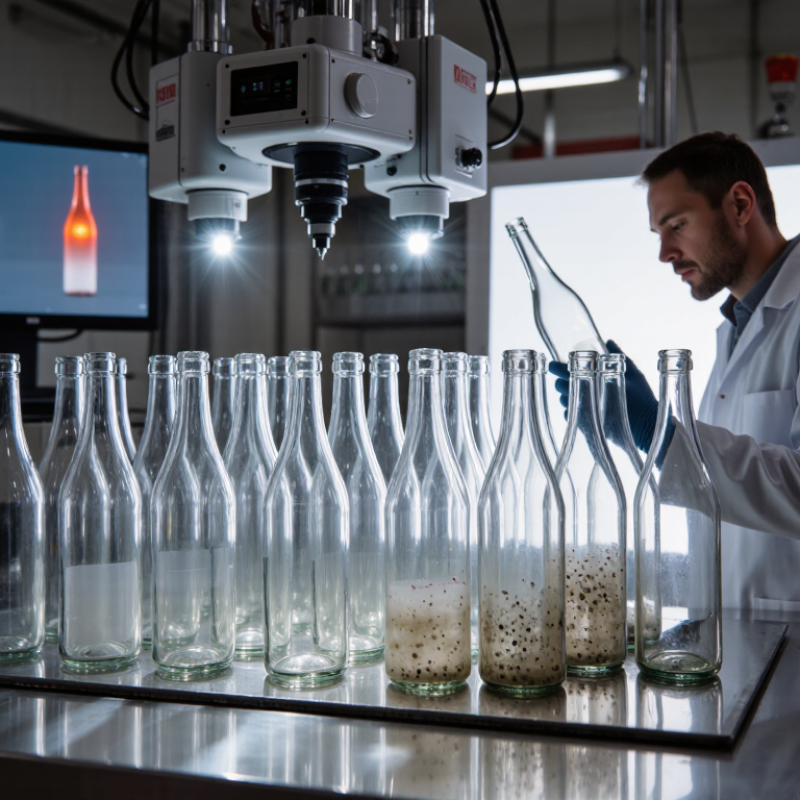
Look closely at the finish. A chipped or tilted neck can prevent a cap from sealing correctly. Examine the sidewall for thin spots, wrinkles, cords, and uneven thickness. Hold the bottle against a bright background. Internal bubbles may look harmless, but larger blisters can weaken the container. Thermal checks may appear as fine, pale lines near the base or shoulder.

Some defects are easy to classify. Others are not. A harmless visual mark can be confused with a structural crack. Lighting, viewing angle, and inspector fatigue can change the decision. This is where many quality programs need improvement.

This guide explains practical inspection methods for 2026. It also considers automated vision systems, sampling limits, and production records. The goal is not perfect-looking glass alone. The goal is consistent, safe, and traceable bottle quality.
How to Identify Common Glass Bottle Defects in 2026?

Glass Bottle Defects: Definitions, Types, and Quality Standards

Glass bottle defects are deviations from the approved design, material, or performance requirement. Some defects threaten safety or sealing. Others mainly affect appearance. Common examples include cracks, checks, stones, blisters, cords, rough seams, and damaged finishes. A thin line near the neck may be a check, while a visible inclusion inside the glass can indicate a stone. Small details matter.

Reliable inspection combines visual checks, measurements, and performance testing. Inspectors examine bottles under controlled lighting and rotate them slowly. They check height, diameter, wall thickness, finish dimensions, and weight with calibrated tools. Relevant standards may include ISO 4802 for hydrolytic resistance, ISO 7458 for internal pressure, and ISO 7459 for thermal shock. Customer specifications still define the final acceptance limits.

Defects are often classified as critical, major, or minor. A sealing defect may be major, while a small surface mark may be minor. Sampling plans such as AQL can support decisions, but they cannot replace process control. No inspection method is perfect. Dust, poor lighting, and rushed handling can hide weak areas. A thoughtful quality team records defect location, size, frequency, and probable cause, then reviews whether the standard itself is clear enough.

Step-by-Step Visual Inspection of Glass Bottle Surfaces

How to Identify Common Glass Bottle Defects in 2026?

Step-by-Step Visual Inspection of Glass Bottle Surfaces

A reliable inspection begins with clean gloves, a neutral background, and diffuse white lighting. Strong glare can hide fine cracks. Hold the bottle at eye level and rotate it slowly. Check the rim, neck, shoulder, body, and base separately. Look for chips, hairline cracks, bubbles, stones, scratches, and uneven glass thickness. A small flashlight can reveal surface marks, but direct light may create false defects.

Compare each bottle with an approved reference sample and the written quality standard. Inspect the mouth carefully, because tiny chips can affect sealing performance. Examine the mold seam for sharp edges or excessive flash. On the base, watch for poor forming, stains, and unstable contact. Experienced inspectors often use a magnifier for suspicious areas. Still, judgment is not perfect. I sometimes recheck harmless reflections after moving the bottle under softer light. That pause prevents unnecessary rejection.

Tips: Rotate slowly. Keep surfaces clean. Use consistent lighting. Mark defects with removable labels. Photograph unclear findings. Record the defect location, size, and severity. Do not rely on one viewing angle. A second inspection can catch what tired eyes miss.

How to Detect Shape, Size, and Dimensional Defects

How to Identify Common Glass Bottle Defects in 2026?

How to Detect Shape, Size, and Dimensional Defects

Shape and dimensional defects can weaken a bottle’s performance before anyone notices a visible crack. A bottle may lean, twist, or show an uneven shoulder. Its base may rock on a flat surface. These problems often appear after forming, cooling, or handling.

During production checks, inspectors compare bottles with approved reference samples. They measure height, body diameter, neck finish, opening diameter, and base thickness. Calibrated gauges improve accuracy. Optical systems can detect oval bodies, tilted finishes, and irregular contours quickly. Good lighting matters. Shadows can hide small distortions.

A single measurement can mislead. Temperature, glass distribution, and tool wear may affect results. I have seen bottles pass a quick visual check but fail when placed on a filling line. That is why repeated measurements provide stronger evidence. Check several samples from different production times. Record the results clearly, including the instrument and inspection conditions.

Look closely at the neck. It should remain centered and accept the intended closure smoothly. Check the base for wobbling, excessive thickness, or a raised center. Measure paired points, not just one side. Small differences can reveal an oval shape. Even experienced inspectors miss subtle defects sometimes. Our assumptions need testing.

How to Identify Common Glass Bottle Defects in 2026?

How to Detect Shape, Size, and Dimensional Defects

This quality-control example shows measured dimensional deviations against practical screening limits for a nominal 500 mL glass bottle. Finish height, body diameter, overall height, base thickness, and body ovality should be checked against the approved bottle drawing, calibrated gauges, and applicable packaging standards. Values outside the control limit may indicate shape, size, or dimensional defects.

Identifying Strength, Stress, and Structural Problems

How to Identify Common Glass Bottle Defects in 2026?

Strength problems often begin where the eye least expects them. Inspect the heel, shoulder, neck ring, and base for checks, sharp fins, stones, blisters, and thin areas. A clean-looking bottle can still fail. Uneven wall thickness may create weak zones during filling, capping, or transport. Measure critical sections with suitable gauges, rather than relying on touch.

Stress defects require different evidence. Residual stress can appear as bright bands through a polariscope, especially around the finish and heel. These patterns may indicate poor annealing or uneven cooling. ISO 7458 and ISO 7459 describe pressure and thermal-shock testing methods. ASTM C148 also addresses thermal-shock resistance, while ASTM C149 covers internal-pressure testing. These standards do not provide one universal pass value. The correct limit depends on the bottle design and intended use.

Structural checks should include finish ovality, verticality, base stability, and shoulder symmetry. FEVE’s 2023 recycling report recorded an 80.1% European glass-packaging recycling rate for 2022. High cullet use supports circular production, but incoming material still needs careful sorting. Ceramic particles or metal inclusions can become hidden stress points. Visual inspection alone is imperfect. I would not approve a production change without reviewing test results, mold wear, and annealing records together. A bottle that survives one pressure test may still fail after repeated thermal cycling.

How to Identify Common Glass Bottle Defects in 2026? - Identifying Strength, Stress, and Structural Problems
Defect or Problem Typical Visual Indicators Main Property Affected Recommended Identification Method Typical Risk Level Practical Disposition
Check or Crack Thin, sharp line at the finish, shoulder, heel, sidewall, or base; may open under light pressure or thermal change. Tensile strength and pressure resistance Inspect under diffuse and directional lighting. Rotate the bottle and examine both the inside and outside surfaces. Use polarized-light inspection when the crack is difficult to see. High Reject the bottle. Cracked glass can propagate suddenly during filling, capping, transport, or consumer handling.
Stone or Foreign Inclusion Small opaque, cloudy, or glass-like particle embedded in the wall; sometimes surrounded by a visible stress halo. Structural integrity and thermal-shock resistance Use backlighting, magnification, and polarized filters. Pay particular attention to inclusions near the heel, base, finish, and narrow sections. High Segregate and reject when the inclusion is embedded, produces visible stress, or is located in a load-bearing area.
Excessive Residual Stress Colored bands, bright patterns, or uneven birefringence visible through crossed polarizing filters. Thermal-shock resistance and fracture reliability Examine the empty bottle between crossed polarizers. Compare the pattern with an approved control sample and investigate abnormal concentration around the finish, shoulder, or heel. High Hold the affected production lot for investigation. Confirm with thermal-shock and strength testing before release.
Uneven Wall Thickness Visible asymmetry, localized thin areas, or inconsistent sidewall appearance; the bottle may feel unbalanced. Impact strength, internal-pressure resistance, and weight distribution Measure at multiple points using a wall-thickness gauge or suitable non-destructive thickness system. Record the minimum and maximum readings. Medium Compare measurements with the approved design specification. Reject bottles below the specified minimum or showing concentrated thin zones.
Out-of-Round Finish Neck opening is visibly oval; closure may sit unevenly, tilt, or require excessive force. Seal performance and closure fit Measure finish dimensions with a calibrated ring gauge, plug gauge, optical comparator, or coordinate measuring equipment. Medium Reject or rework the affected lot if the finish is outside the closure supplier’s dimensional tolerance.
Chipped Finish or Rim Missing glass, sharp edge, nick, or irregular fragment at the mouth or sealing surface. Container safety and seal integrity Inspect the finish under strong diffuse light and run a controlled tactile or automated edge inspection. Check for loose glass particles before filling. High Reject immediately. A damaged rim can cause leakage, closure failure, sharp-edge injury, or glass contamination.
Bird Swing or Seam Projection Sharp raised projection, fin, or excess glass along a mold seam, often near the neck or shoulder. Handling safety, dimensional fit, and local stress concentration Rotate the bottle under directional lighting and inspect mold-seam areas. Verify that the projection does not interfere with the closure or label. Medium Reject sharp projections. Minor, non-sharp seam marks may be accepted only when they remain within the approved appearance and dimensional limits.
Base Rocker or Unstable Base Bottle rocks on a flat surface, has a raised base point, or shows uneven contact around the bearing ring. Stability, impact behavior, and line handling Place the bottle on a verified flat plate and measure rocking or tilt. Inspect the base ring for uneven glass distribution and deformation. Medium Segregate bottles that cannot stand securely or that create instability on filling, inspection, packing, or retail shelves.
Internal Pressure Weakness No reliable visual indication; may be associated with thin walls, poor distribution, scratches, or high residual stress. Resistance to carbonation and internal pressure Use a validated burst-pressure or pressure-resistance test on representative samples. Combine results with dimensional and visual inspection. High Do not release a lot that fails the applicable product specification or shows a statistically significant reduction in pressure resistance.
Thermal-Shock Weakness Usually not visible before testing; bottles may crack after a rapid temperature change. Resistance to sudden temperature differences Apply a validated thermal-shock procedure appropriate to the container’s intended use. Inspect for cracks, checks, and breakage after conditioning. High Investigate failed samples for residual stress, uneven thickness, inclusions, and process-temperature variation before approving the lot.
Surface Scratch or Abrasion Visible line, scuff, or worn area on the outside surface, especially around the heel and sidewall contact zones. Surface strength and resistance to impact or handling damage Inspect under oblique lighting and compare with an approved visual standard. For process investigations, review conveyor guides, dead plates, and bottle-to-bottle contact. Medium Reject deep, sharp, or intersecting scratches. Evaluate shallow cosmetic marks against the agreed appearance limit.
Distortion or Deformation Collapsed sidewall, irregular shoulder, tilted neck, warped base, or shape inconsistent with the design profile. Dimensional accuracy, stacking, closure alignment, and mechanical strength Use a profile template, optical measurement, or coordinate measurement. Check filled and empty containers where temperature-related deformation is suspected. Medium Hold the lot when deformation affects filling, capping, labeling, stacking, or the container’s ability to stand upright.
Blister, Bubble, or Open Seed Gas pocket, elongated bubble, or surface opening visible within or near the glass wall. Local strength and surface integrity Inspect with backlighting and magnification. Determine whether the feature is fully enclosed, connected to the surface, or associated with visible stress. Medium Reject surface-connected defects and investigate large or clustered enclosed bubbles in load-bearing areas.
Screening results should be evaluated against the bottle’s approved drawing, intended filling conditions, applicable regulatory requirements, and validated internal quality limits. Visual inspection alone cannot confirm pressure resistance or thermal-shock performance.

Recording Defects and Determining Acceptable Quality Levels

How to Identify Common Glass Bottle Defects in 2026?

Reliable quality decisions begin with consistent records. Inspect bottles under uniform lighting, preferably against a matte, contrasting background. Rotate each bottle slowly and check the mouth, neck, shoulder, body, base, and seams. Look for cracks, chips, blisters, stones, cords, scratches, and uneven walls. Record the defect location, size, appearance, batch number, inspection time, and operator. Photographs help, but they should support measurements rather than replace them.

Use clear defect categories. A crack near the mouth may affect sealing and deserves critical attention. A sharp chip can create a handling hazard. Small cosmetic marks may be minor, but only when they stay within the agreed specification. Acceptable Quality Levels, or AQLs, support sampling decisions; they do not make defects acceptable automatically. The buyer and manufacturer should define sample size, inspection level, defect limits, and rejection rules before production begins. A trained inspector should also verify borderline findings with calibrated gauges or magnification.

We once used the phrase “surface mark” too broadly. That wording caused inconsistent decisions between shifts. Now, inspectors describe length, depth, and position separately. Even so, judgment can vary. Fatigue, reflections, and dirty gloves can distort results. Rotate staff, clean inspection surfaces, and review disputed samples together. Keep rejected and accepted examples for training. Quality records should reveal patterns, not merely count failures. A rising number of base cracks may indicate forming or cooling problems that require process review.

FAQS

Which bottle dimensions should inspectors measure?

Measure height, body diameter, neck finish, opening diameter, and base thickness. Use calibrated gauges. Check paired points, not one side.

How can inspectors detect an uneven bottle shape?

Place the bottle on a flat surface and watch for rocking or leaning. Compare its contour with an approved reference sample. Optical checks can reveal oval bodies and tilted finishes.

Why are repeated measurements important?

One measurement can hide a problem. Temperature, glass distribution, and tool wear may affect results.Measure samples from different production times. Record the instrument and inspection conditions. Quick checks can be misleading.

What neck defects should inspectors look for?

The neck should remain centered and accept the intended closure smoothly. Check the finish for ovality, tilt, and uneven edges. Small differences may expose larger forming problems.

Which areas are most vulnerable to strength defects?

Inspect the heel, shoulder, neck ring, and base carefully. Look for sharp fins, checks, stones, blisters, and thin areas. These details may appear minor.

How can hidden wall-thickness problems be detected?

Use suitable gauges to measure critical sections. Do not rely only on touch or appearance.Uneven thickness can create weak zones during filling, capping, or transport. A clean surface proves little.

What does residual stress look like in a glass bottle?

A polariscope may show bright bands around the finish or heel. These patterns can suggest poor annealing or uneven cooling.The evidence is useful, but not perfect. Confirm it with pressure and thermal-shock testing.

How should structural testing be planned?

Review finish ovality, verticality, base stability, and shoulder symmetry. Combine test results with mold-wear records and annealing data. One successful pressure test does not prove long-term reliability.

Can recycled glass create bottle defects?

Recycled glass supports circular production, but incoming material still needs careful sorting. Ceramic particles and metal inclusions can become hidden stress points. Visual inspection alone may miss them.

What should inspectors do when results conflict?

Repeat the measurements under controlled conditions. Check temperature, lighting, equipment calibration, and sample timing.Do not approve the change too quickly. Assumptions need testing.

Conclusion

This guide explains what are common defects in glass bottles and how to identify them through a practical quality-control process. It covers visible surface problems such as cracks, chips, bubbles, stones, scratches, wrinkles, and uneven glass distribution, while also explaining how to distinguish minor cosmetic flaws from defects that may affect safety or performance. Readers will learn how to inspect bottles under suitable lighting and check for contamination, surface irregularities, and finishing issues.

The article also describes methods for detecting shape, size, and dimensional problems, including tilted necks, uneven walls, incorrect openings, and unstable bases. It addresses strength, stress, and structural concerns through checks for thermal stress, weak areas, and poor resistance to handling or pressure. Finally, it explains how to record findings consistently, classify defect severity, and determine acceptable quality levels according to product requirements and inspection criteria.

Isabella

Isabella

Isabella is a dedicated marketing professional with a sharp focus on driving brand growth and engagement through strategic content creation. With an extensive background in digital marketing, she combines her passion for storytelling with her keen understanding of industry trends to deliver......